{article.name}

Where to Start When Restoring a Deck
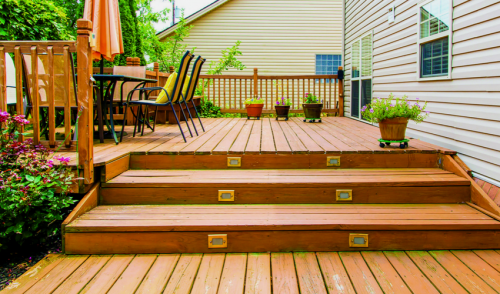
If you made the decision to restore your deck rather than replace it, then the first thing you want to do is make sure it is structurally sound. If possible, take a look below and ensure that the framing is in good condition. This could mean anything from physical damage to rot. Additionally, make sure that the footings are sound and not showing signs of heaving. Heaving occurs when deck footings are not deep enough in the ground, in reference to the frost line in your area.
Generally, most decks are in structurally good condition but just need to be restored due to weather exposure. For example, winter can be hard on decks. The buildup of dirt and grime, coupled with the freeze/thaw factor can take a toll over time.
Providing that the underlying structure is sound, inspect your deck for loose or raised boards. Be on the lookout for popped nails as well. Check your railings to see if they are loose and if they are free from splinters or raised fasteners. Posts and post-tops should be firmly in place, as well as the spindles. Before restoring the rest of your deck, these repairs should be made first. If you find that there are a large number of such repairs needed, and you will need to purchase a significant amount of lumber, consider the option of replacing all of your deck flooring and stair treads with low-maintenance composite materials. The initial cost may seem high, but future time and money saved by less need for maintaining/restoring your deck in the future makes this option a great value.
If your need for repairs is minor or if you have tightened and/or replaced loose boards and railings, give the deck a thorough cleaning to see how much restoration is needed. You’d be surprised how much better a deck looks after a thorough cleaning. To do so, completely clear the deck of any furniture, rugs, grills, planters etc. Sweep the entire deck and clear the spaces between boards to promote water flow when you clean.
There are many deck cleaning products available to choose from, or you could just use a mild bleach solution. If using a commercial deck cleaner, be sure to follow the instructions on the label as closely as possible. Using too strong of a solution can cause damage to surrounding plant life. If you’d rather not use chemicals and have a power washer available, be careful. Use slow, even strokes to prevent scoring the wood or stripping away too much of the surface. Too much of a heavy hand with the power washer can leave grooves along the grain of the wood and a fuzzy, fibrous surface that will require sanding in order to make it smooth and sealable again. As you clean, be on the lookout for any raised nails or screws and countersink them to avoid catching furniture or poking bare feet.
Once the deck has been cleaned and dried, take a close look to see if it’s time to reseal or re-stain. Typically, decks should be resealed every 2 to 4 years. At this point, it’s probably fairly obvious that the deck should at least be sealed. During the cleaning process, you would have noticed if the water was either repelled or absorbed by the wood. It was absorbed, that means the previous sealant is no longer up to the job. Keep in mind that with just sealing, there are some diminishing returns on the appearance of the deck over time. If the weathered look is not what you desire, consider an opaque sealer. These pigmented sealers can rejuvenate the appearance of a deck by giving a solid consistent color—and possibly a whole new look.
Comments